In July I found out that a total eclipse was going to be present in Uganda. Having never seen one I thought that would be interesting to see but did not really start reading up as to what was needed to take pictures of it. Then 3 weeks before the eclipse I started reading up on what I potentially needed to take picture of the same. I searched and read numerous of advice pages and then did what I could with what I had or could get.
(the pictures of the eclipse can be found on this link http://matsglobetrotter.smugmug.com/Total-Eclipse-2013 )
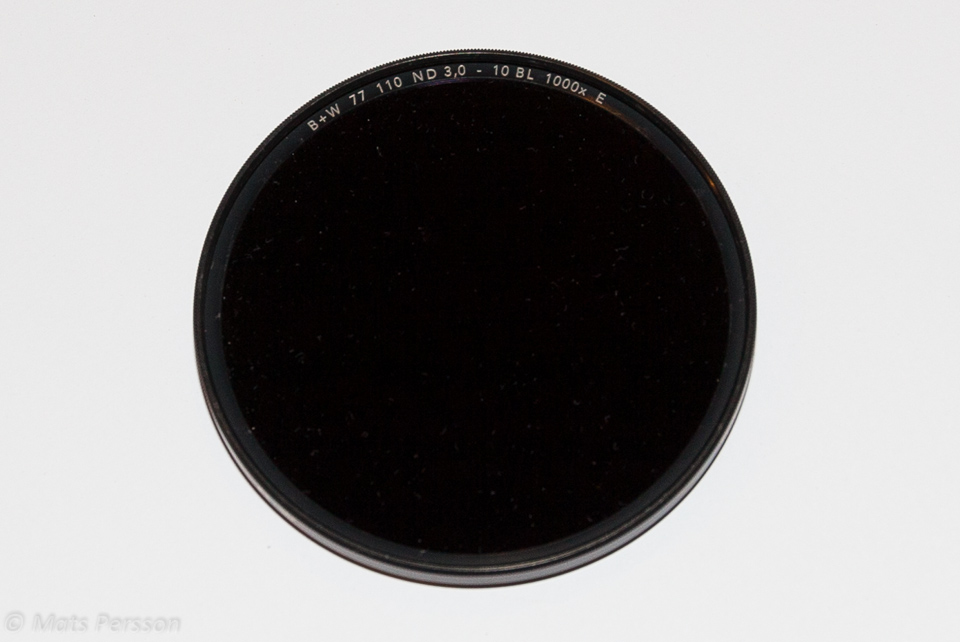
Filter
The sun is strong so clearly I needed a proper filter to protect the camera. Not knowing anything I figured out I could get and B+W filter with a ND3.0 level which was used for welding inspection. I figured that would be good enough. I had it send down DHL with the help of my dad.
Ofcourse I was continuing to read and found the B+W website that specifically says the filter is not good for taking pictures of the sun due to the IR radiation that it does not protect against.
Anyway at 150 USD I was not going to find another filter if it was wrong.
Eye Protection
I have kept seeing that welding glass from masks would be required to look at the sun, ofcourse not knowing there are various grades. Then I found out as per various web advice that minimum was number 14 welding glass or higher. In Uganda if you find any it is probably level 8 or around there but I found one serious shop selling welding glass shade 11. I bought 10 of those as I figured If they work then I can spare for some people that might pass by when I am out there taking pictures. Ofcourse it was a rainy day so I could not verify if they worked
I tested the glass out 2 days later and it was perfect to even look at the sun in full daylight. I could even detect sunspots on the surface vaguely so I figured this one would be good for my eyes.
Camera and Lens.
I already had a Canon 5D MK II and read that a 400 mm lens would be a very good lens to use for an amateur photo of the eclipse. I have a 100 -400 M Canon L lens with stabilizer and so forth.
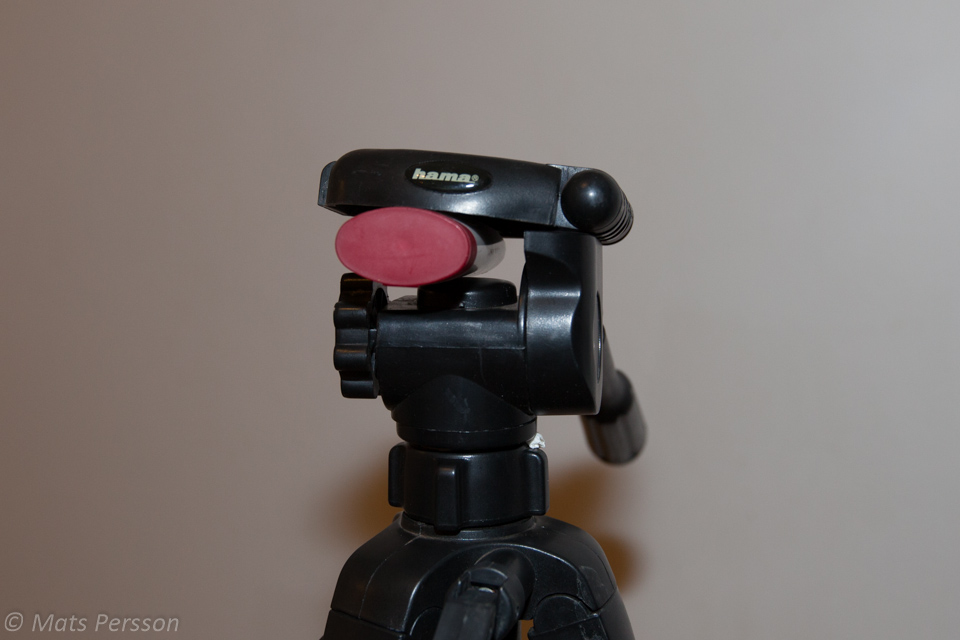
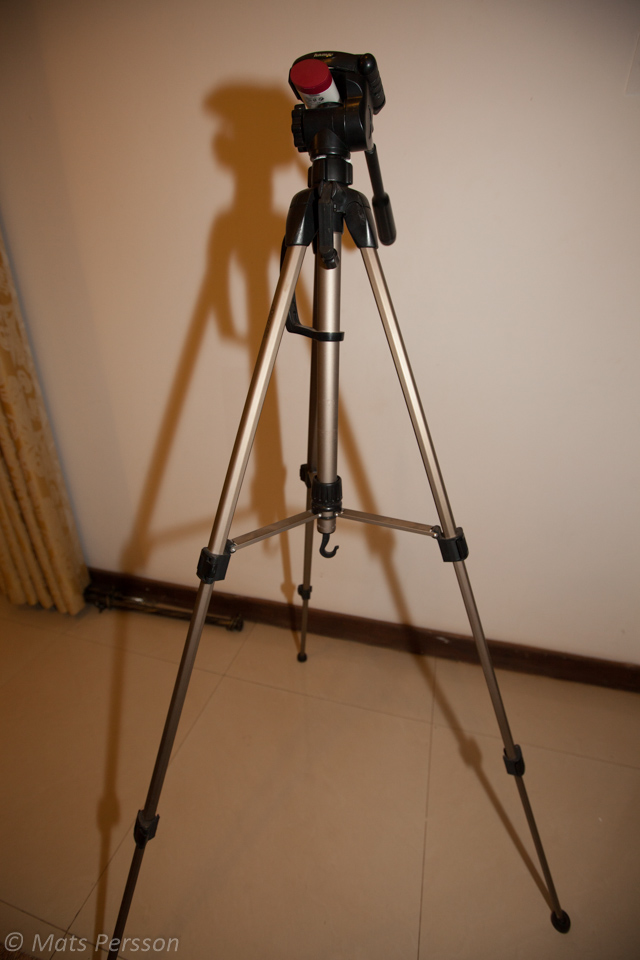
As a tripod I have an old HAMA foldable type which is not really good for my zoom lens as it is very heavy.
With the filter on the camera and a sunrise about 15 Degrees above the horizon I shot the first picture of the sun before running to work. It turned out somehow dark and a bit shaky but atleast I could determine that the camera, lens, filter somehow should be ok to use.
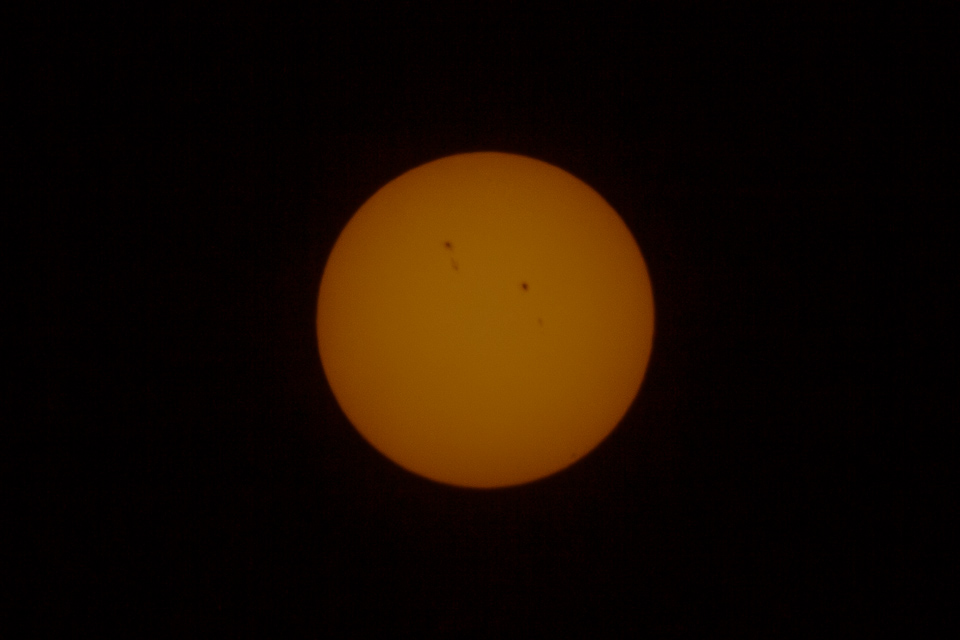
The next morning on the weekend I made a full effort to stabilize the camera free hand but leaning against my balcony railing and that gave a much better result.
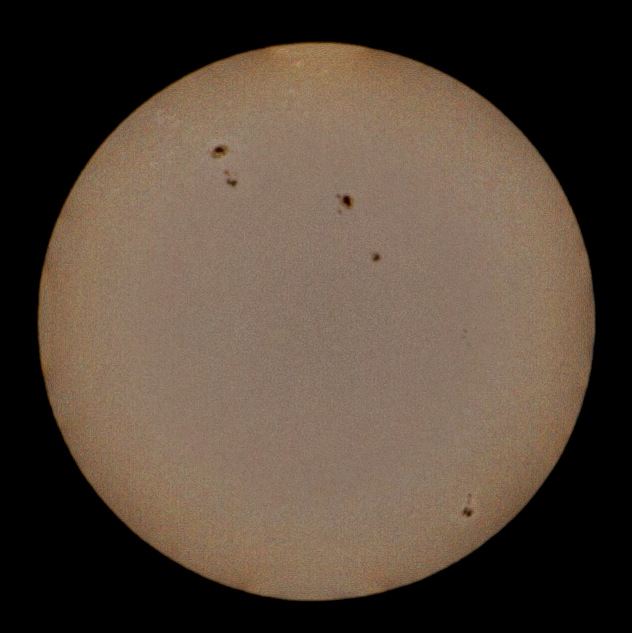
I took a few pictures with various settings and then adjusted the pictures in Lightroom before putting them into the Photomatix HDR processor.
Out came a picture I liked. I could see clear sunspots, clear sun overall so was pretty pleased with myself.
Then I put the camera on the tripod and wondered if it would actually work. Took a few more pictures with various settings and turned on and off the stabilizer while still being in manual focus and realized that I got a worse result from my hand-holding. Tripod with support on the railing would work but of course I would not have that in the field.
Then I started the software SetnC. It has a mode to take 5 or 9 shots in rapid succession if camera is in manual mode. I tried it out while zooming in on a group of houses 2 km away. What I saw was disheartening. The lens was jumping up and down as I have seen guys trying to shoot and automatic rifle would end up with. Thus more or less spraying bullets in an upward curve with me taking picture that was getting too blurry. That was 2 km away not 380,000 km away!
Not having a shop around selling tripods in Uganda and only having 2 days to go I started analysing what was wrong in with the tripod to see if I could somehow fix it.
- The lower legs where too weak so why not fold them in. unfortunately it did not help.
- I put a load on the hook below the stand. That did not change anything though except to bend the lower legs more.
- The tripod has a cogwheel piston that can raise the camera up and down. That one was way too weak so I never used it by default. However fully retracted somehow there was still some kind of movement of the piston inside the tube when I took pictures. Opening it up I could see the movements so had to somehow fill it up. First I tried paper but it was too loose so in the end I ended up pushing in uncooked spaghetti of all things. As many as I could fit between the outer tube and the piston to block it from moving sideways. Then closed it up. That helped some 🙂
- On the same cogwheel piston there was a tightening nut in plastic ontop. However there was also a gap between the nut and the piston. I filled it up with papernapkin as much as I could push down and then tightened the piston and nut. That helped stop some movement.
- Then the camera shoe. Not a ball type but rather a plastic piece fed on one side and then adjustable to ensure the camera can be in vertical or horizontal position. Of course my camera probably weigh 2 kg too much for the design with the lens so that one had to be somehow supported. As I had to have tilt-able movement I could not just glue it stuck with support under but needed something movable. Not having any obvious item in the end settled for a plastic container with lotion I had received from an airline??? Somehow it seemed to be perfect fit in height and would be able to squeeze in after I had mounted the camera and could be re-adjusted at the different elevations while not necessarily propagate the movement further as it could absorb some.
- Finally the tilt mechanism. There was a noticeable small gap even when it was tightened. Seemingly the nut inside was not fixed to the plastic making a not even half a millimetre movement in horizontal movement. I did not find a solution for this gap. But tried to rather open it up so the camera was in vertical position as that might be better anyway to stop me from having to move the camera too much while the sun would be moving downwards during the eclipse. That made the shaking like an automatic rifle effect even worse.
- I then tried to remount the camera vertical with the lotion plastic bottle in between while turning the camera in the lens mounting bracket instead. But this did not make things better so back to the original setting.
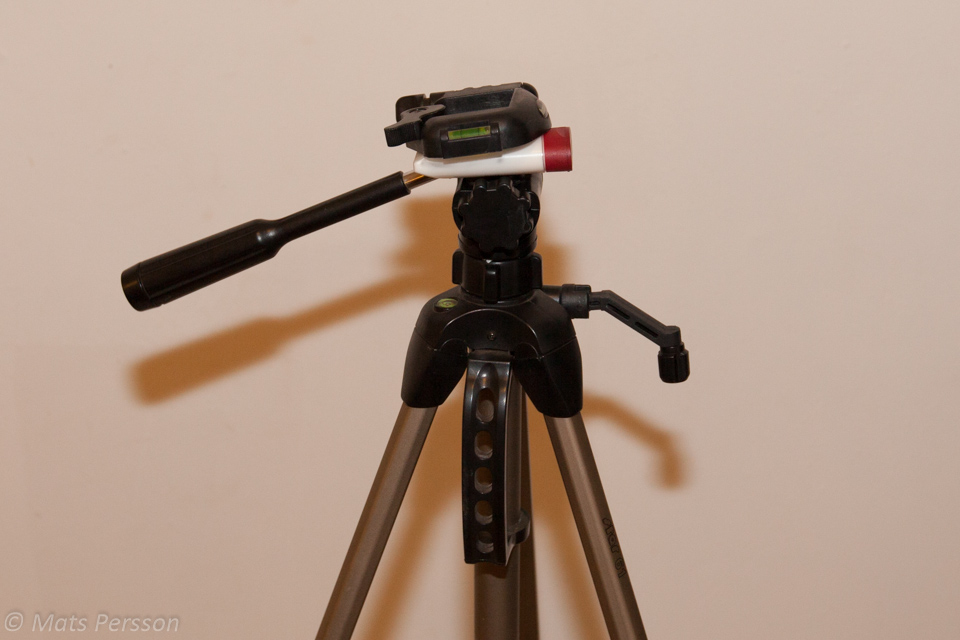
With all these issues I considered the tripod to be the weakest link in my setup.
Software.
I had read on the net that KISS (Keep it Simple stupid) thus no automatic picture taking and so forth. Take a few pictures but focus on looking as the first advice on several sites. I love taking pictures and this was a once in a lifetime opportunity so clearly I would not leave it at that. Especially with a bit of a challenge attached.
After searching around for two evenings I found the SetnC software for a windows platform. It seemed simple enough and I could do test runs which I did with various settings. Just doing the full sequence against the low morning sun showed me it would be possible to do some reasonable photography though I had no clue about the final settings.
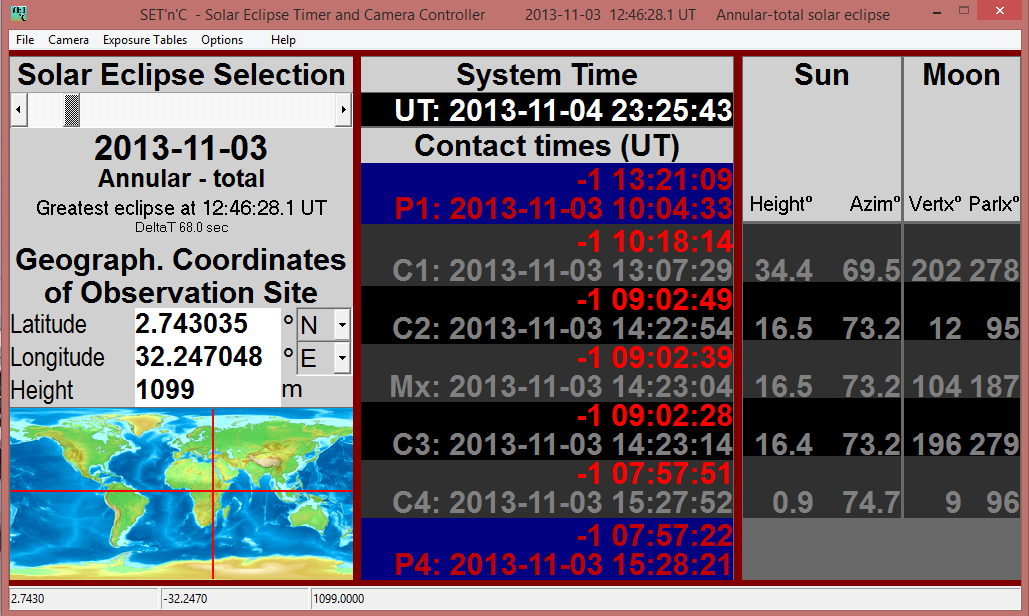
I made a exposure table and set it up. As my own laptop has a bad battery I put the setup in my new office laptops that lasts 5 hours on one charge.
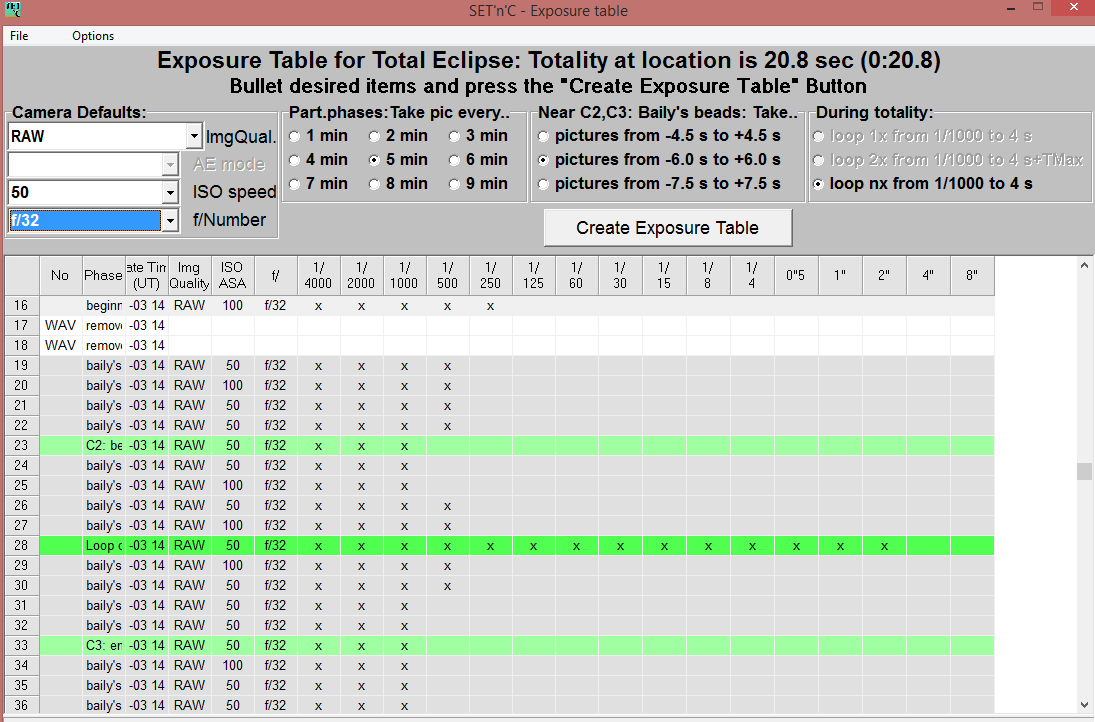
It was critical to ensure all settings on the camera and programme was fully in tune. The programme had a bad habit of trying to set the camera in JPG format and not in the RAW format the auto included settings for timings where a bit too few in the exposure table so I included more just to be safe. As I was not sure of the camera I also put ISO settings on both 100 and 50 in various places.
But overall the software seemed fine as long as the camera was started before the programme was started. A bit of hassle to each time load the exposure table and turn on the speaker commands for removing and putting on the filters again but got into the routine of checking what I needed before the eclipse. Mind you I had the software 2 days before the eclipse.
When looking at how the pictures would need changes in settings I realized that even getting 5 pictures manually with something to show for it would be a virtual impossibility. With the software I had a sequence of 200 pictures with about half being taken within about 8 minutes during the eclipse. In hindsight this was by far the most important decision to be able to take the pictures
Location.
In Uganda everyone was talking about Pakwach and Owino school as the by far the best place for the event. Knowing Uganda in general after so many years living here and knowing the rainy seasons are a bit tricky. Reading up on www.eclipser.ca was even more depressing.. 50/50 chance of seeing the eclipse in Uganda with 80% or so in Turkana, Kenya.
4 days before the eclipse I was in Kasese via Fort Portal and it was sunshine but too much clouds in general and the mountains generating more and more clouds during the day.
3 days before the eclipse I was in Masindi and it was raining when I arrived with big black clouds all over. In the morning 2 days before there was sunshine but cloud cover to about 50% in general and thus at an angle of 15 – 35 degrees I could basically see clouds , thick clouds and no blue sky.
1 day before the eclipse I was in Kampala and it was raining heavily but also clearing up at night.
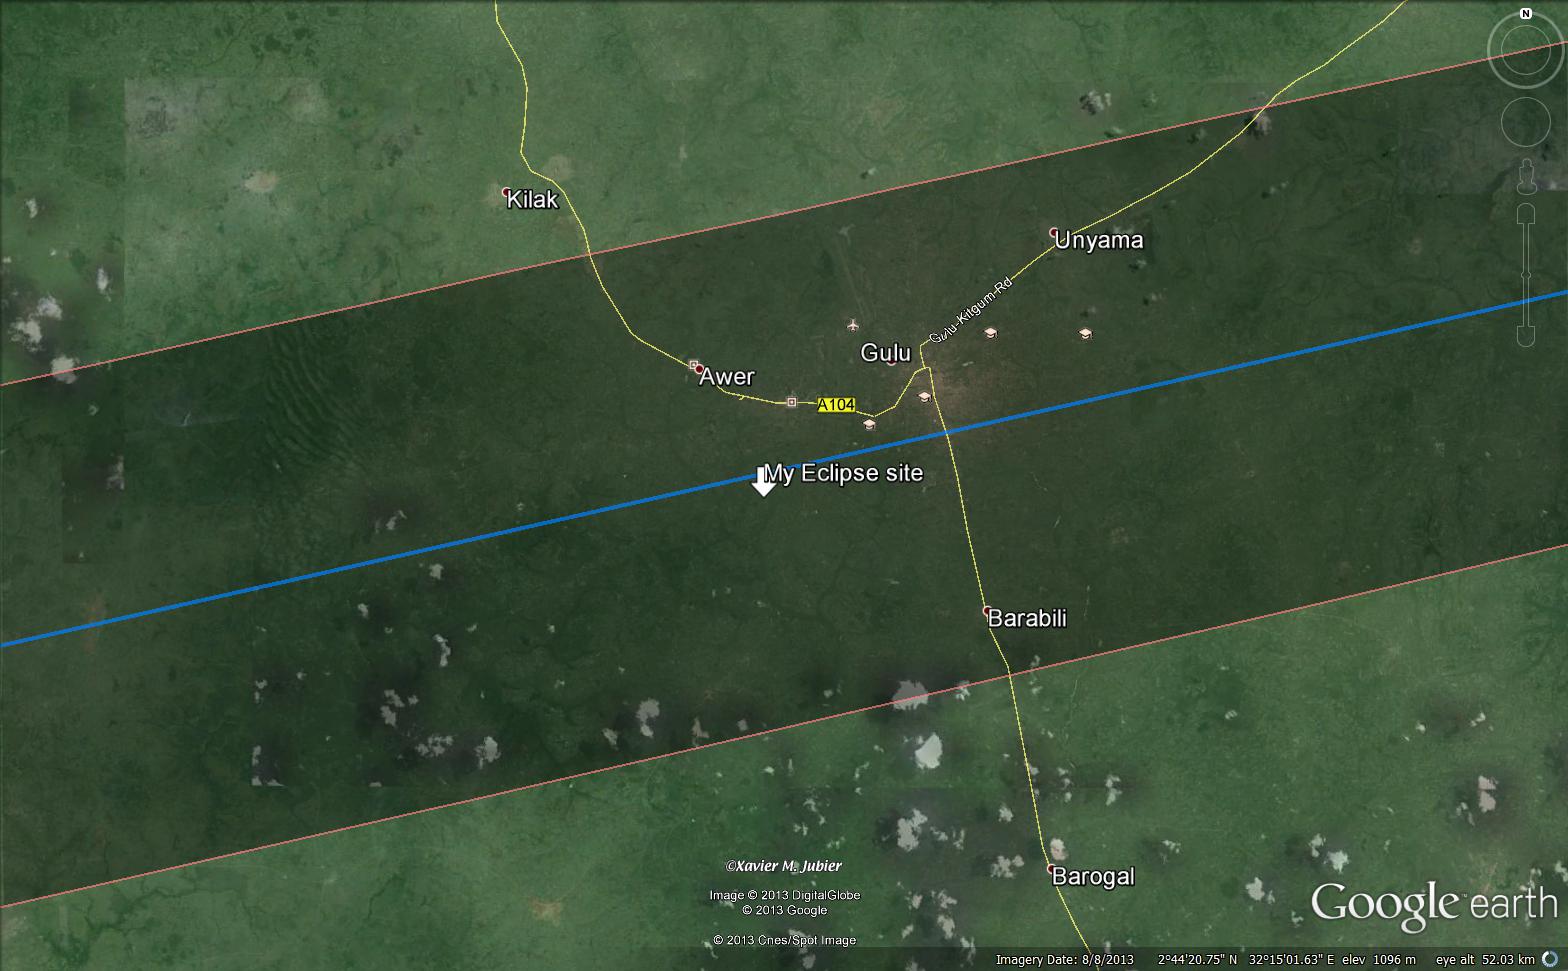
Due to the situation I figured that if I would have a chance it would rather be close to Gulu. Just south of Gulu so I could be right on the center line with maximum eclipse to be seen. With the President of Uganda heading to Pakwach I concluded there would be an enormous security apparatus and thousands of people fighting for spots while trying not to get robbed by various bad elements.
Sunday morning (eclipse day.)
We woke up at 0630. Had breakfast. Packed all my things and by 0845 I was on the road. I heard about a lot of traffic heading out of town so figured we better move early. Going to Gulu could take 3 hours (IF!!!! The roads and traffic would be ok)
Traffic was bad and roads where even worse. The first 5 km was full of roadworks and jam. But not a very bad jam as I had seen coming back from Masindi. Then the roads where good up to the turnoff towards… Pakwach. As I was continuing north to Gulu the roads got worse and worse with bigger and bigger potholes and more and more roadworks. Roadworks in Uganda means dusty gravelroads with speedbumps every 50 meters…… for 20 km at a time!
We arrived in Gulu around 2:30. Then turned on the IPAD with GPS and started heading out towards my selected locations. I had 3 marked waypoints of locations I thought would be good. This was just south of Gulu but out on some small roads rather turning in to cattle paths that I had as a target. It took a while to get the maps loaded on a slow link but somehow I had enough network coverage to get me where I wanted.
Arriving at the spot.
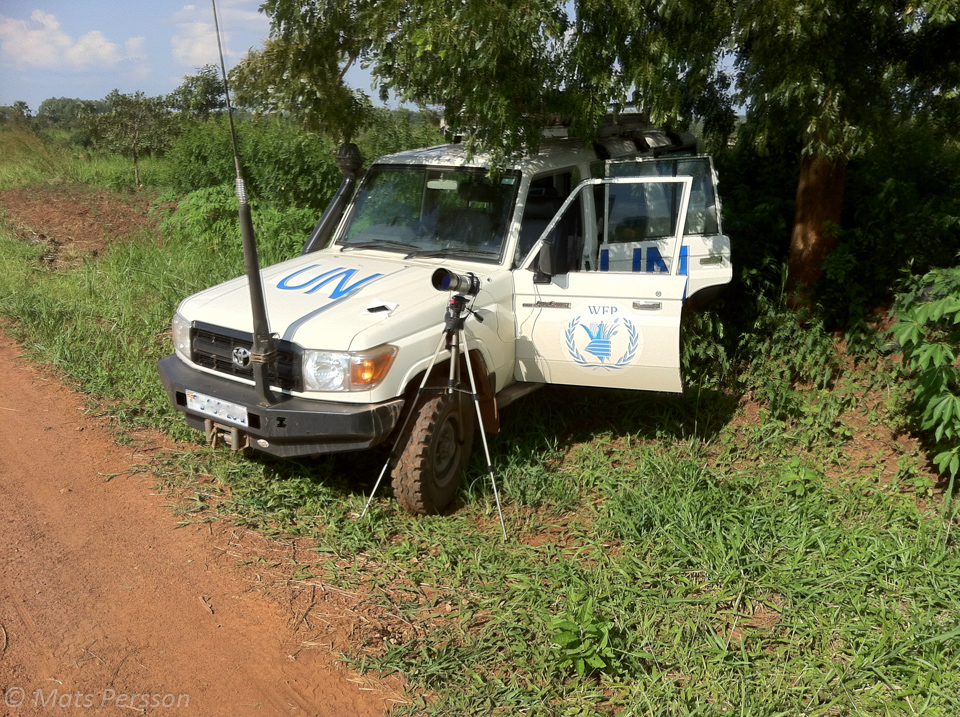
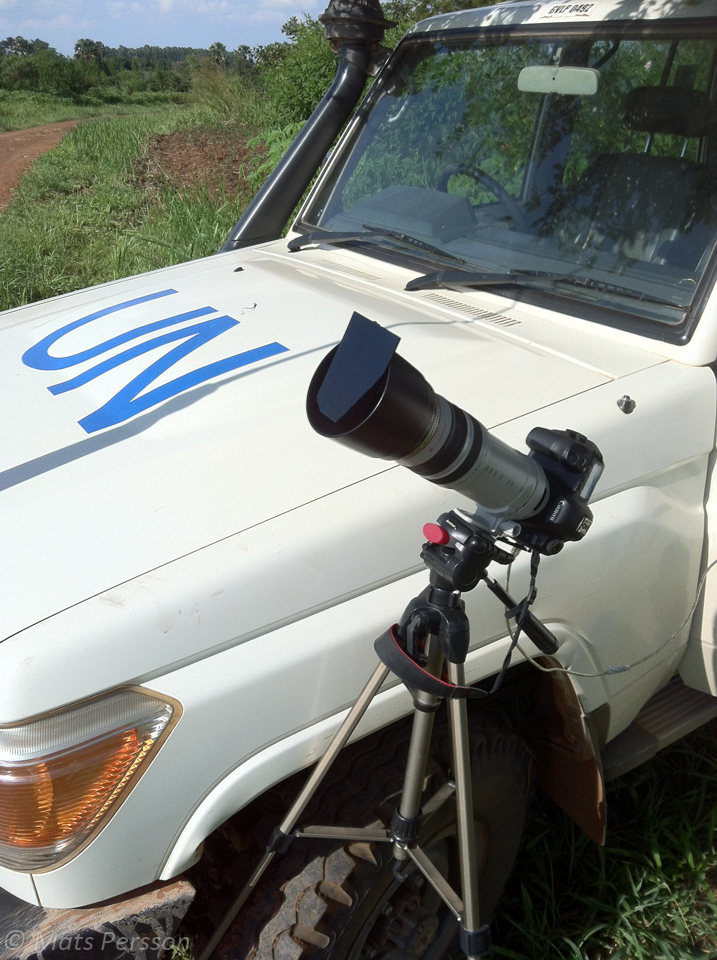
The car was parked under a tree facing the sun. I mounted the camera gear and as the tripod was a bit too weak I somehow managed to wedge 2 of the legs towards the front wheel of the car and it gave extra stability. It also meant I could connect the USB cable and put the laptop in the car rather than have it in the sun. I rolled down the window and could still access the computer. I fixed the cables so they would not flap in the wind if it would start to blow a bit and started the software. Doors where closed and no one to touch the car 🙂
There were clouds in the sky but by the time my setup was done somehow ALL!!!! Clouds had moved away leaving the sky just about clear from any clouds around the sun. It was as if the clouds knew there was about to be an eclipse.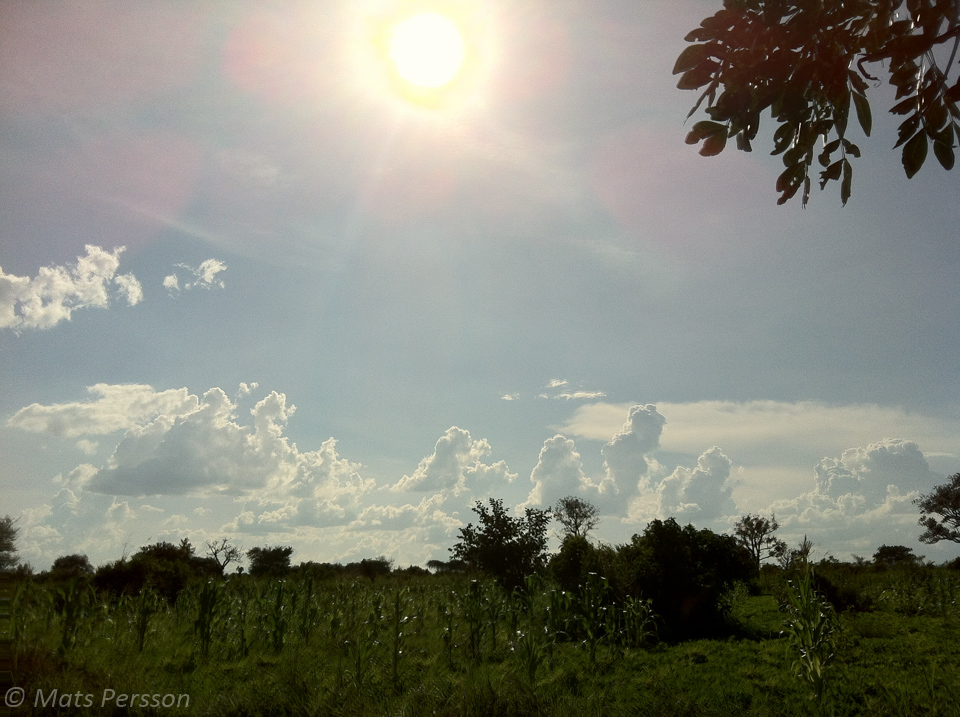
I zoomed in and took a few pictures. The night before I had read the final piece of the puzzle on apertures and shutter speeds. Well the document I had showed a number of filters, shutter speeds and apertures but only for filter stronger than mine. The key was though that they used F/32 as the smallest one and with ISO 50 or a 100 I could get seemingly good shutter speeds with my filter when I tried. I tried a few other settings with the software just to be sure but it looked ok.
Adjusting the focus was a bit tricky my filter was not optimal in strength so I had to look in the eyepiece with strong sunglasses and then keep my eyes a bit back while adjusting so I could see a sunspots on the sun surface. When I had the sunspot clear I looked at the marker on the lens. I kept checking on the sunspots as the best way to determine if I was correct in focus.
To ensure the Camera and lens did not overheat due to being focused and in the line of the sun full time I simply put a welding glass lens into the light protector. It fitted right in as long as the lens was somehow elevated.
Rather than have the stress of looking and taking pictures I started the software system and it was working from the first moment. I checked the sun through the welding glass, checked the timing on the software and 1.5 minutes before the next photo run I adjusted the elevation so the sun was just above the focus points (as close as I could get.) Then waited for the sequence of shooting pictures. When it ended I put the welding glass back. So it continued.
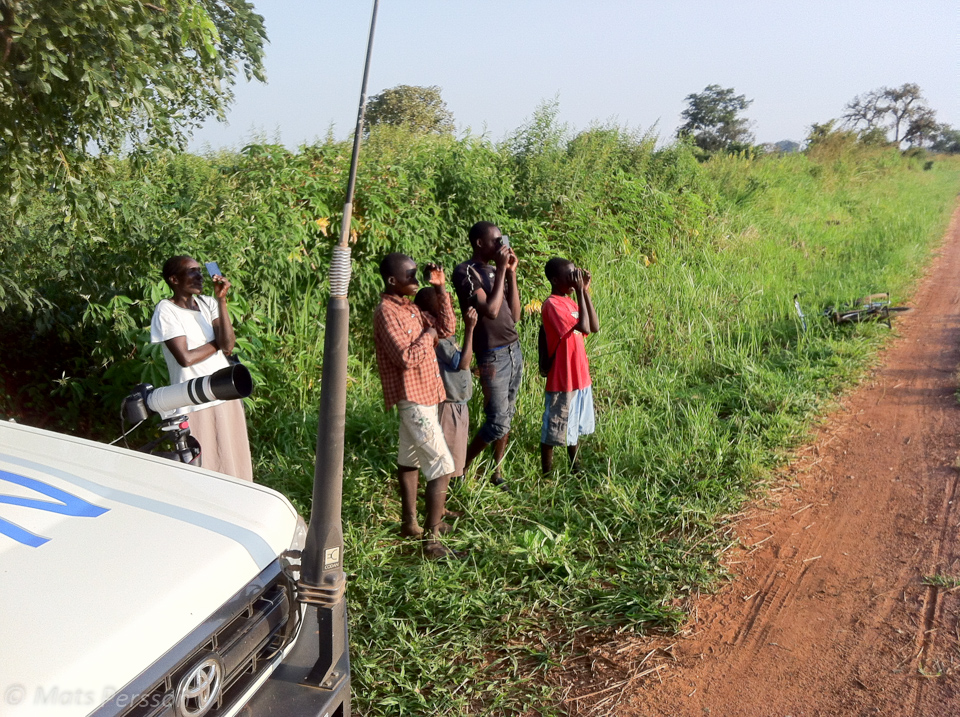
Some people kept coming by as it was a small village road with people walking around. I showed them the partial sun through a glass and gave them one to look more. Then continuing my session. Looking adjusting, taking pictures and do it all over.
As I had parked under a tree I could sit in the shade. It got darker and darker until the software suddenly told me… REMOVE FILTERS, REMOVE FILTERS. Which I quickly did. Then I focused and made sure it was all set up for the next run. It was dark as in just after sunset with lingering light.
I looked up and just as I looked the camera started a quick sequence of taking pictures while I looked up without the welding glass to see the baily’s beads and the total eclipse. It was simply amazing to see. It was like seeing a fireworks brighter and more interesting than I have ever seen. Light somehow popping up here and there around the sun in small sharp patches.
There was 6 other people right there that I had given welding glasses and we all cheered as we saw this light show live infront of us. That show alone made my day and I could just hope that somehow the camera and setup had been able to capture it somehow to some level.
Then the Sun started to come back under the moon and the Software Commandeered. Attach Filters, Attach filters which I quickly did.
Then the sequence of photos started again. After 2 rounds of photos with 5 minutes in between the clouds started to move in and during the 3rd round the sun was almost completely covered so I decided that it was enough in terms of taking pictures. The sun more or less did not come out of the clouds for any real photo sessions.
I disconnected the camera and was eager to see if any pictures was sharp and if anything was captured of the baily bead session. I scrolled back and saw some. Clear sharp 🙂 Then a number of completely black frames. At least I did have some very good ones I thought.
I packed up and drove home. 6 hours later I was back home turned on the computer and offloaded the 200 or so pictures I had. I was very happy to note I had good pictures with both eclipse and sunspots, baily beads nice and sharp. I turned up the exposure in Lightroom on the completely black pictures and could see the red colors as the shape of the suns flares and gases or what to call it around the sun during the total eclipse. Am still trying to figure out how to process those pictures and maybe do the composite pictures I have seen others do by overlaying frames. Shooting pictures in RAW format is a must as there is so much data that would have been lost in the JPG format. Eclipse photos will come in the next post.
It was clearly a unique experience and now I am just waiting for a lunar eclipse so I can try shooting pictures of that too. I might not travel half way around the world for a solar eclipse but if I am just a flight away… who knows.
The full gallery of pictures from the eclipse is at this link. Only some pictures so far but will put more as they get ready. http://matsglobetrotter.smugmug.com/Total-Eclipse-2013